|
The following
Tips & Time-Saving Solutions
have been compiled from years of artwork inquires.
Some of the most asked
questions include:
- Special Computer Software Needed
- Best Fonts & Sizes
- Help with Developing Stencils
 No
Special No
Special
Computer Software NeededYou can
quickly make your artwork or text copy on any computer, with
your existing software.
Print your artwork or text copy in Black & White Settings
- Best Quality - dark black is best for your
transparency.
Time-Saving Hint: Hold your transparency up to the light
to make sure you don't see any light through the dark black type
areas. |
 Font
Tips Font
TipsNO Color -
NO Grayscale - NO Half Tones
Keep your font with consistent DARK lines.
Note: If you are sending us your artwork, we can accept
these formats:
| BMP |
EPS |
| GIF |
JPG/JPEG |
| PDF |
PSD |
| TIFF |
TIF |
Time-Saving Hint:
The smallest font for
making good stencils is
ARIEL 6 px BOLD.
|
 Stencil
Making Tips Stencil
Making TipsWe have included two video
tutorials - although - for editing purposes - the developing
process is filmed quicker than normal.
The videos are quick-loading - How To Make a Stencil & How To
Mark Knives (which shows stencil making).
For the developing process, follow these steps -
repeating if necessary.
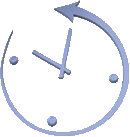
- Exposure Time is 2 Minutes.
- Developer - Go over your
stencil in the developing solution, counter-clockwise, then
clock-wise with the white sponge.
- Make sure to do this
process for 1 Minute on BOTH SIDES of
the Stencil.
- Rinse with warm water until
not slimy - pat
dry with a paper towel or hair dryer.
- Hold up to the light to see if it's completely see-through.
- Repeat if Necessary.
Save your Developer - it's Reusable!
Time-Saving Hint: You will begin to FEEL the MESH
on BOTH SIDES of the Stencil With Your Fingertips as it develops. |
Video Tutorial
How To Make Dura-Film Stencils
How To Mark Knives in
Seconds
|